
Camping is a great outdoor activity, but dealing with moldy tents can be a real downer. Tents are prone to mold and mildew growth when they’re stored wet or damp for long periods. If you’ve discovered that your tent has fallen victim to mold, don’t worry – there are ways to fix the problem and salvage your tent.
We’ll walk you through some methods on how to remove mold from your tent. And we’ll discuss some preventative measures to help you avoid this situation in the future. So grab your gear and let’s get started on restoring your tent to its mold-free state.
Table of Contents
Identifying Mold and Mildew on Tents
When it comes to mold and mildew, it’s essential to identify them early on. Knowing the signs will help you take quick action to clean your tent and extend its lifespan. Not sure what to look for? Here are a few tips to help you spot mold and mildew on your tent.
Mold and mildew are closely related, but they often look distinct and may require different cleaning methods. They’re both fungi that grow in damp, humid environments and can cause discoloration and unpleasant smells.
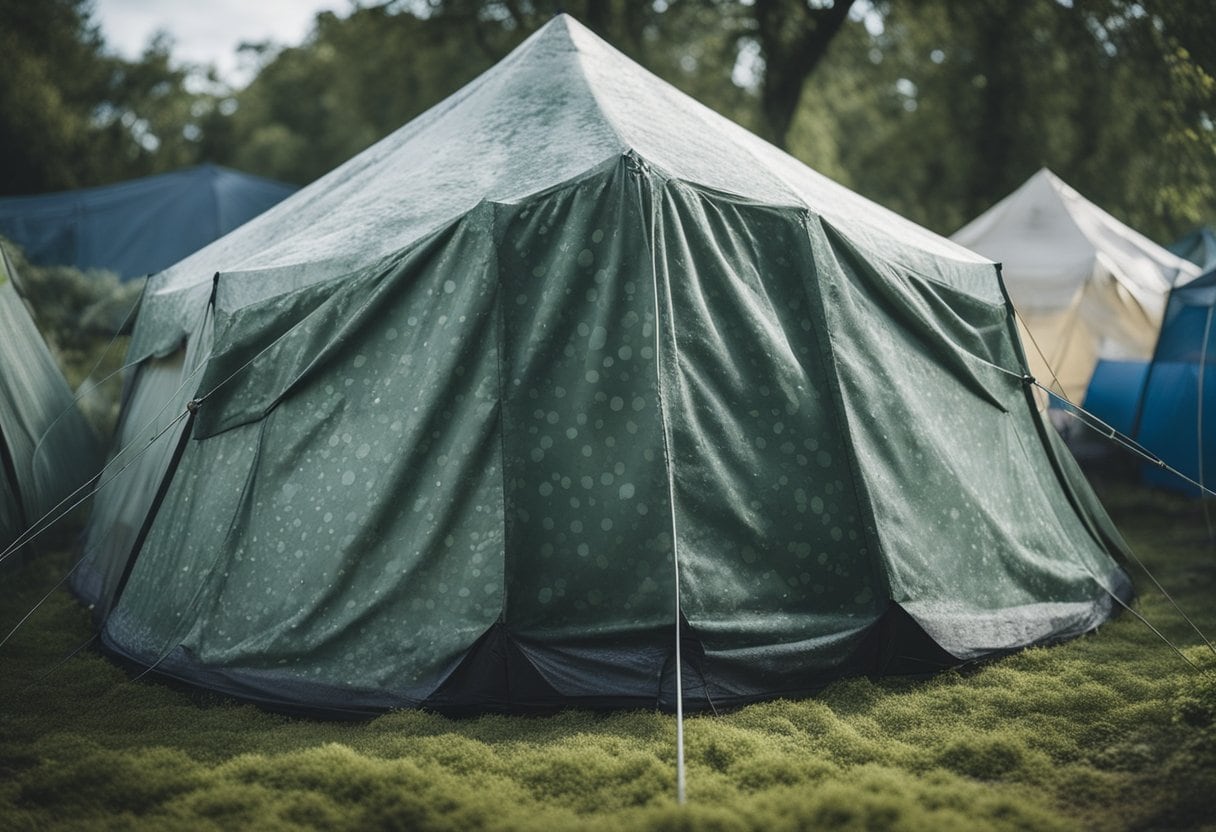
Mold typically appears in green, black, or brown fuzzy or slimy patches, while mildew is white or gray powdery and can turn brownish-yellow or black if left untreated. You’ll commonly find them forming on the canvas material of your tent, especially in crevices and folds.
To aid detection, keep an eye out for the following:
- Discolored areas: Mold and mildew tend to change the color of the tent’s fabric, making it appear off-white or yellowish, and can gradually darken over time.
- Musty or earthy smell: A damp, stale, or musty odor is often an indicator that mold or mildew is present on your tent.
- Visible spores: Mold spores might resemble tiny dots on the tent’s surface, sometimes clustered together, or forming more extended streaks.
That being said, it’s important to remember that not all mold and mildew are easily visible. Sometimes, they may be hidden in inaccessible areas, such as seams or zippers. Regularly airing out your tent and inspecting it for signs of mold before and after use will help you stay ahead of any potential issues.
The Importance of Removing Mold and Mildew
Mold and mildew are not only unsightly, but they can also have adverse effects on your health and the longevity of your tent. If left unchecked, mold can cause allergies or even exacerbate asthma symptoms. Prolonged mold exposure can lead to respiratory issues for you and your family or friends.
When mold grows on your tent, it creates a musty odor that can be off-putting for you and your camping mates. Properly cleaning and removing mold helps you maintain a fresh-smelling environment while also preserving the fabric of your tent for longer use.
The truth is that mold and mildew are common problems when dealing with tents, especially if stored away damp or not properly dried. So, it’s essential to take action as soon as you notice any signs of them on your tent.
Preliminary Tent Cleaning Steps
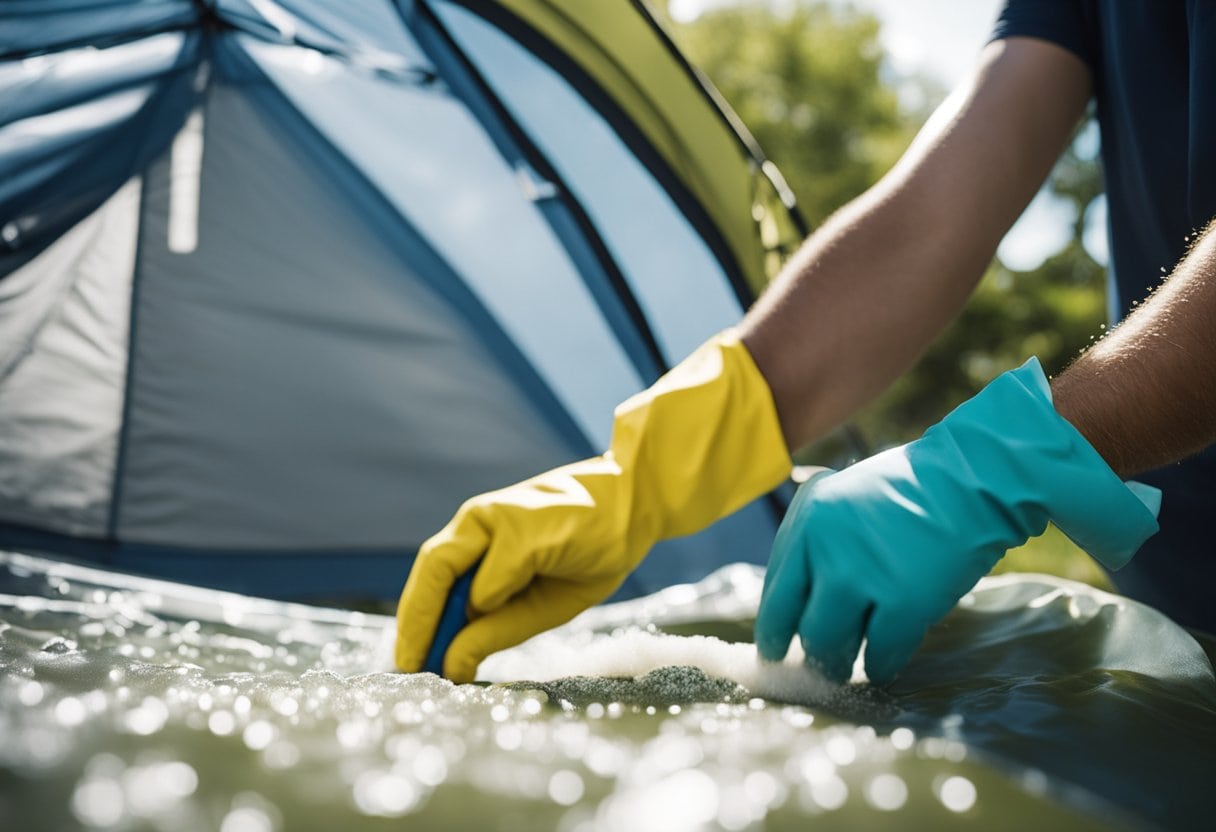
Before diving into the mold removal process, it’s essential to clean your tent thoroughly to remove dirt, mud, and debris. Start by finding a suitable space like a garage or yard to set up your tent. Follow these simple steps to get your tent clean and ready for mold treatment:
- Prepare soapy water: Fill a bucket or basin with warm water and add a few drops of mild dish soap. Stir until the soap is mixed well with the water.
- Remove loose debris: Use a soft-bristle brush or vacuum cleaner (with a brush attachment) to remove any loose dirt and grime on the tent’s surface.
- Wipe down the tent: Dip a sponge or soft cloth into the soapy water and gently wipe down the entire tent surface. Pay extra attention to areas with built-up dirt or mud.
- Treat stubborn stains: For tougher stains like dried mud or dirt, use a soft brush with soapy water for a gentle scrub. Avoid using harsh chemicals or stiff brushes as they can damage the tent fabric.
- Rinse thoroughly: Use clean water to rinse off the soapy solution from your tent. A hose with a spray nozzle or a large container filled with water can be used for this purpose.
- Drying the tent: After cleaning, it is crucial to let the tent air dry completely before proceeding with mold removal. Set up the tent in a shaded area with good air circulation to speed up the drying process.
Once your tent is clean and dry, you can proceed to the mold removal process.
Using Household Items to Remove Mold
There are a few options in your house that can help with the mold removal.
Bleach Method
To treat mold and mildew on your tent’s fabric, you can use a bleach solution. Mix one part bleach with 10 parts water in a container. Be sure to wear gloves when handling bleach. Gently scrub the moldy areas using a cloth or soft brush dipped in the solution. Make sure not to oversaturate the fabric, as this may damage it. Once you’ve treated the mold stains, thoroughly rinse the tent with water to remove any bleach residue.
Vinegar Method
White distilled vinegar is another effective household item for cleaning mold on tent fabric. First, mix equal parts distilled white vinegar and water in a spray bottle. Next, spray the solution onto the mold stains and let it sit for about 20 minutes. Use a soft brush or cloth to scrub the fabric. The vinegar not only removes the mold stains but also helps neutralize any lingering odors. After scrubbing, rinse your tent with water to remove the vinegar solution.
Baking Soda Method
Baking soda is a gentle yet effective solution for removing mold from tent fabric. To create a paste, mix water and baking soda in a 1:1 ratio. Apply the paste to the mold stains using a soft brush or cloth. Gently scrub the affected areas until the mold stains begin to disappear. Rinse your tent thoroughly with water to remove any remaining baking soda residue.
Commercially Available Mold Removal Products
Revivex Pro Cleaner
Revivex Pro Cleaner is a great product to consider when dealing with mold on your tent and camping gear. This concentrated solution is designed to effectively remove dirt, grime, and mold without damaging the fabric or waterproof coatings.
To use Revivex Pro Cleaner, simply mix a small amount of the solution with water, following the instructions on the product label. Apply the solution to the affected areas of your tent using a soft cloth or sponge. Gently scrub the mold to lift and remove it from the fabric. After cleaning, rinse the tent thoroughly with water to remove any residue and let it air dry completely.
Benefits of Revivex Pro Cleaner:
- Effective on tents and camping gear
- Safe for use on fabric and waterproof coatings
- Concentrated solution for value and efficiency
Concrobium Mold Control
Another option for mold removal is Concrobium Mold Control. This product not only cleans mold and mildew but also helps to prevent them from returning. It’s a non-toxic option that is suitable for use on a variety of surfaces, including tent fabrics.
To use Concrobium Mold Control, just follow these simple steps:
- Fill a spray bottle with the solution
- Spray the affected areas of your tent, making sure to cover the entire moldy surface
- Allow the solution to work for the recommended time (usually around 15 minutes)
- Wipe or scrub the area with a damp cloth to remove the mold
- Rinse the area with water to remove any leftover residue
- Allow your tent to air dry completely before storing or using
Benefits of Concrobium Mold Control:
- Non-toxic and environmentally friendly
- Effective at not only cleaning but also preventing future mold growth
- Suitable for various surfaces, including tent fabrics
Preventing Future Mold and Mildew Growth
Taking care of your tent is crucial to prolonging its life and ensuring it stays mold-free. To prevent mold and mildew growth on your tent, follow these simple steps:
- Dry the tent thoroughly: After each camping trip, make sure to air out your tent under sunlight. This helps eliminate any remaining moisture, reducing the chance of mold growth. If it’s not possible to dry the tent outside, set it up indoors and use a fan to speed up the process.
- Pitch the tent in a suitable location: When setting up camp, choose well-draining and slightly elevated areas to pitch your tent. Avoid damp or humid locations which can promote mold and mildew growth.
- Maintain the tent’s waterproof coating: A tent’s waterproofing can degrade over time, so apply a waterproofing spray to the tent fabric and seams periodically. This helps repel water and maintain the integrity of the tent.
- Pay attention to the zippers and poles: Some components of your tent might be more prone to rot and mold. Regularly clean zippers and poles with a mild soap and water solution, and let them dry completely before storing.
- Keep dirt and debris away: Before packing up your tent after a camping trip, be sure to clean it of any dirt or debris. Soil and other organic material can encourage mold growth, so a quick sweep or shake can make the difference.
- Store your tent in a cool, dry place: When not in use, store your tent loosely rolled or folded in a breathable storage bag, away from direct sunlight or heat sources. Ensure it’s stored in an area with low humidity to prevent mold and mildew from forming.
By being mindful of these practices, you’ll ensure your tent remains in top condition while reducing the risk of mold and mildew growth.
Further Reading
📚 Explore More: Camping Tents